Are you tired of constantly having to wax your surfaces? Do you want to achieve long-lasting results that will save you time and effort in the long run?
Look no further! In this article, we will guide you through the proper waxing techniques that will help you achieve a beautiful and durable finish. By understanding the purpose of waxing and following the right steps, you can ensure that your surfaces stay protected and maintain their shine for an extended period of time.
To begin with, it is essential to prepare the surface before applying wax. This involves thoroughly cleaning and removing any dirt, dust, or debris that may hinder the wax’s effectiveness. By doing so, you create a smooth and even base for the wax to adhere to, ensuring better results.
Additionally, choosing the right wax for your specific surface is crucial. Different waxes have different properties and are designed for various purposes. By selecting the appropriate wax, you can maximize its effectiveness and ensure that it provides the necessary protection and longevity.

So, let’s dive into the world of proper waxing techniques and discover how you can achieve long-lasting results with ease.
Key Takeaways
- Heating wax to the recommended temperature is crucial for effective hair removal and to avoid uneven application or inadequate results.
- Allowing the wax to dry and cure properly is important for achieving long-lasting results and enhancing the wax’s protective properties.
- Implementing proper care and precautions, such as using mild cleaners and avoiding harsh chemicals or abrasive cleaners, helps maintain and protect the waxed surface.
- Following these precautions ensures the long-lasting beauty and durability of the waxed surface.
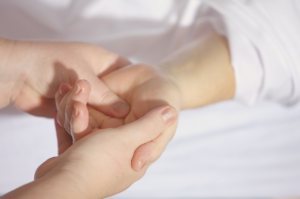
Understand the Purpose of Waxing
To truly grasp the essence of waxing, you must comprehend its purpose.
Waxing is not just about removing unwanted hair; it serves multiple benefits.
Firstly, regular waxing helps to slow down hair growth over time. Unlike shaving, which only cuts the hair at the surface, waxing pulls the hair out from the root, weakening the hair follicles. This leads to finer and sparser hair growth, making the results of waxing last longer than other hair removal methods.

Another benefit of waxing is that it exfoliates the skin. When the wax is applied and removed, it takes away dead skin cells, leaving your skin feeling smooth and rejuvenated. By regularly removing the top layer of dead skin, waxing helps to prevent ingrown hairs and keeps your skin looking fresh.
Now, let’s talk about minimizing pain during waxing. Although waxing may cause some discomfort, there are a few techniques that can help reduce the pain. Firstly, it’s important to choose a professional waxing technician who has experience and uses high-quality products. They’ll ensure that the wax is applied at the right temperature and removed quickly and efficiently. Additionally, applying a numbing cream or taking a pain reliever before your waxing appointment can help to minimize any pain or discomfort you may feel.
By understanding the purpose of waxing and implementing these techniques, you can achieve long-lasting results while minimizing any pain or discomfort. So go ahead, embrace the benefits of regular waxing and enjoy smooth, beautiful skin for weeks to come.
Prepare the Surface
Before diving into the world of waxing, let’s kick things off by prepping the surface in a way that’ll have you grinning from ear to ear. Surface preparation is a crucial step to ensure that you achieve long-lasting results with your waxing technique. It involves getting the area ready for waxing by removing any dirt, oils, or dead skin cells that may interfere with the wax adhering to the hair follicles. To help you enjoy the process, here are three essential steps to prepare the surface effectively:
Cleanse the area: Start by washing the area with a gentle cleanser to remove any dirt or oils. This will create a clean surface for the wax to adhere to and prevent any potential infections or irritations.
Exfoliate gently: Use a gentle exfoliating scrub or brush to slough off any dead skin cells. This step helps to prevent ingrown hairs and ensures that the wax can grip the hair properly.
Dry thoroughly: After cleansing and exfoliating, make sure to dry the area thoroughly. Any moisture left on the skin can interfere with the wax’s ability to adhere properly, leading to less effective results.

Proper surface preparation sets the stage for a successful waxing session, allowing the wax to adhere to the hair follicles effectively. By following these steps, you can ensure that your waxing experience is comfortable and that you achieve long-lasting results that’ll leave you feeling confident and satisfied.

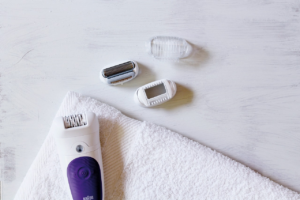
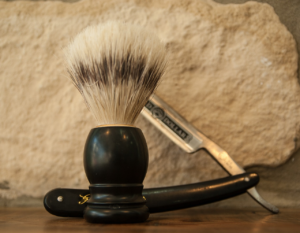
Now that you have an understanding of the importance of surface preparation, let’s talk about the essential waxing tools you’ll need. These tools are crucial for achieving a smooth and seamless waxing experience. Here are the key waxing tools you should have on hand:
Waxing spatula: This tool is used to apply the wax to the desired area. It allows for precise application and ensures that the wax is spread evenly.
Waxing strips: These strips are used to remove the wax and hair from the skin. They come in various sizes to accommodate different areas of the body.
Wax heater: A wax heater is essential for warming the wax to the proper temperature. It ensures that the wax is melted evenly and maintains the ideal consistency for application.
Having these waxing tools readily available will make your waxing process more efficient and enjoyable. They’re designed to help you achieve the best results possible and ensure a smooth and comfortable experience. So, gather your waxing tools, prep the surface, and get ready to enjoy the benefits of long-lasting hair removal.
Choose the Right Wax
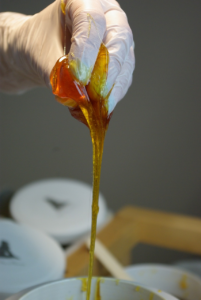
Selecting the appropriate wax for your hair removal needs is crucial to ensure a successful and comfortable experience. When it comes to choosing the right wax, there are several considerations and options to keep in mind. First, you need to determine the type of wax that suits your needs. There are two main types of wax: hard wax and soft wax. Hard wax is ideal for sensitive areas such as the bikini line or face as it adheres only to the hair and not the skin, minimizing discomfort. On the other hand, soft wax is more suitable for larger areas like the legs or arms as it can be applied in thin layers and removed with a strip.
Next, you should consider the ingredients of the wax. Look for waxes that are made with natural ingredients and free from harsh chemicals, as this will minimize the risk of irritation or allergic reactions. Additionally, consider the temperature at which the wax needs to be heated. Some waxes require a lower temperature, making them more suitable for at-home use, while others require a higher temperature, which is better suited for professional salons. Lastly, don’t forget to take your skill level into account. If you are a beginner, opt for a wax that is easy to work with and forgiving, while experienced users can experiment with different textures and consistencies. By considering these factors, you can find the best wax for your specific needs and achieve long-lasting results with your waxing sessions.
Apply the Wax Properly
When applying the wax, make sure to use even and thin layers for best results.
This will help the wax adhere properly to the surface and prevent it from becoming too thick or clumpy.
Additionally, it’s important to always follow the manufacturer’s instructions to ensure you’re using the wax correctly and achieving the desired outcome.
By following these guidelines, you’ll be able to apply the wax properly and achieve long-lasting results.
Use even and thin layers
To ensure a professional finish, it’s essential to apply wax in smooth, thin layers, allowing for effective hair removal and longer-lasting results. By achieving smooth results, you can avoid the dreaded wax build-up that can occur when too much product is applied at once.
When applying the wax, make sure to spread it evenly and thinly across the desired area. This allows the wax to adhere to the hair properly, ensuring a clean and thorough removal. When the layer is too thick, it can become difficult to remove and may leave behind residue, leading to a less satisfactory result.
Using even and thin layers of wax also helps to minimize discomfort during the hair removal process. Thick layers can be more painful to remove, as they adhere more tightly to the skin. By applying thin layers, the wax is able to grip the hair firmly without excessive pulling on the skin. This not only makes the process more comfortable for the client but also reduces the risk of skin irritation or damage.
Additionally, thin layers of wax allow for better control and precision when removing hair, resulting in a neater and more precise finish. So remember, when it comes to waxing, less is often more. Apply thin layers of wax to achieve smooth results and avoid unnecessary wax build-up.
Follow the manufacturer’s instructions
By following the manufacturer’s instructions, you can ensure a professional finish and maximize the effectiveness of your waxing experience. The manufacturer’s instructions provide valuable guidance on how to properly use the waxing product, including the recommended temperature, application technique, and duration of application.
By adhering to these instructions, you can avoid common mistakes that may result in less effective hair removal or potential damage to your skin. One important aspect emphasized in the manufacturer’s instructions is the temperature at which the wax should be heated. Heating the wax to the recommended temperature ensures that it spreads evenly and adheres to the hair follicles effectively. Deviating from the recommended temperature can lead to uneven application and inadequate hair removal.
Moreover, following the duration of application specified in the instructions is crucial. Leaving the wax on for too long can result in skin irritation or burns, while removing it too quickly may not effectively remove the hair. In addition, following the manufacturer’s instructions is essential to maintain the manufacturer’s warranty. Not following the instructions may void the warranty and leave you without any recourse if the product does not perform as expected.
Therefore, it’s crucial to carefully read and follow the instructions provided by the manufacturer to achieve long-lasting results and ensure a successful waxing experience.
Allow Sufficient Drying and Curing Time
Properly allowing the wax to dry and cure is crucial for achieving long-lasting results. Patience is key when it comes to waxing, as rushing the process can lead to subpar results. By giving the wax sufficient time to dry and cure, you ensure that it adheres properly to the surface and provides optimal results.
Here are a few reasons why patience is important in achieving long-lasting results with proper waxing techniques:
Proper Adhesion: Allowing the wax to dry and cure fully ensures that it adheres properly to the surface. This means that it will stay in place for a longer period, minimizing the chances of it peeling or wearing off prematurely. Patience in this step helps to create a strong bond between the wax and the surface, resulting in a more durable finish.
Uniform Finish: Rushing the drying and curing process can result in an uneven finish. By patiently waiting for the wax to dry completely, you ensure that it settles evenly and creates a smooth, uniform surface. This is essential for achieving a professional-looking result that lasts.
Enhanced Protection: Giving the wax enough time to dry and cure enhances its protective properties. The curing process allows the wax to harden and create a barrier against environmental factors such as UV rays, moisture, and dirt. Patience in this step ensures that the wax can provide long-lasting protection, keeping your surfaces looking their best for an extended period.
Incorporating patience into your waxing routine is essential for achieving optimal results. By allowing sufficient drying and curing time, you ensure proper adhesion, a uniform finish, and enhanced protection. So, take a deep breath, be patient, and let the wax work its magic for long-lasting and impressive results.
Maintain and Protect the Surface
Maintain and protect your surface by implementing proper care and precautions. After waxing, it’s crucial to provide surface protection to ensure long-term maintenance.
This can be done by avoiding harsh chemicals or abrasive cleaners that may damage the waxed surface. Instead, opt for mild cleaners specifically designed for waxed surfaces. Regularly cleaning the waxed surface with these gentle cleaners will not only maintain its shine but also protect it from dirt, dust, and other contaminants that can compromise its longevity.
In addition to cleaning, it’s essential to take preventive measures to protect the waxed surface. Use coasters or placemats to prevent heat or moisture from damaging the wax. Avoid dragging heavy objects across the surface as this can cause scratches. If possible, place protective pads under furniture legs to prevent them from scratching the waxed surface.
By following these simple precautions, you can ensure the long-lasting beauty and durability of your waxed surface.
Frequently Asked Questions
How often should I wax my car to maintain its shine and protection?
To maintain the shine and protection of your car, it’s recommended to wax it every three to four months. This waxing frequency ensures that your car’s paint remains protected from harmful elements like UV rays, dirt, and road grime.
By following the best waxing practices, such as using a high-quality wax and applying it in even, thin layers, you can achieve optimal results. Regular waxing not only enhances the appearance of your car but also forms a barrier that repels water, preventing potential damage and prolonging the life of your vehicle’s paint job.
So, make sure to prioritize waxing your car every few months to keep it looking its best and protected from the elements.
Can I use the same wax for both my car’s exterior and interior surfaces?
Yes, you can use the same wax for both your car’s exterior and interior surfaces. Using an all-in-one car wax offers convenience and saves you time and effort. It eliminates the need for multiple products and can provide adequate protection and shine for both the inside and outside of your car.
However, there are some pros and cons to consider. On the positive side, using the same wax simplifies the maintenance process and reduces the number of products you need to purchase. It can also save you money in the long run.
However, some all-in-one waxes may not offer the same level of protection or durability as specialized products designed for specific surfaces. Additionally, using a single wax may not provide optimal results for both your car’s exterior and interior. It’s important to carefully choose a high-quality all-in-one wax that meets your specific needs and preferences.
Is it necessary to clay bar my car before waxing it?
Before waxing your car, it’s not necessary to clay bar it, but doing so can provide several benefits.
While clay bars are commonly used to remove contaminants from the paint surface, there are alternative methods available.
These alternatives include using clay mitts or clay lubricants, which can achieve similar results.
However, it’s important to note that clay bar treatment offers a more thorough cleaning by effectively removing embedded dirt, road grime, and oxidation.
By using a clay bar or its alternatives, you create a smooth and clean surface, allowing the wax to bond better and last longer.
This pre-waxing preparation helps to enhance the appearance of your car’s exterior, protect the paint from contaminants, and achieve a long-lasting shine.
What is the difference between carnauba wax and synthetic wax?
When choosing between carnauba wax and synthetic wax for your car, it’s important to consider the pros and cons of each.
Carnauba wax, made from the leaves of the Brazilian carnauba palm tree, is known for its deep, warm shine and natural protection against UV rays. It provides a rich, wet-looking finish and is preferred by many enthusiasts for its natural and traditional appeal. However, carnauba wax tends to have a shorter lifespan and may require more frequent applications.
On the other hand, synthetic wax, usually made from polymers and other synthetic compounds, offers longer-lasting protection and durability. It can withstand harsh weather conditions and provides a high level of shine and protection. Synthetic wax is also easier to apply and remove compared to carnauba wax. However, some enthusiasts argue that it lacks the warmth and depth of shine that carnauba wax provides.
Ultimately, the choice between carnauba wax and synthetic wax depends on your personal preferences and the specific needs of your car. If you’re looking for a natural, warm shine and don’t mind more frequent applications, carnauba wax may be the way to go. If durability and ease of use are your priorities, synthetic wax might be a better fit. Consider the conditions your car is exposed to and the level of shine and protection you desire when making your decision.
Can I apply wax on top of existing paint protection film or ceramic coating?
Yes, you can apply wax on top of existing paint protection film or ceramic coating. However, it’s important to consider the benefits of using paint protection film over waxing.
Paint protection film provides a layer of transparent film that protects your car’s paint from scratches, chips, and other damage. It’s highly durable and can withstand daily wear and tear.
On the other hand, waxing not only enhances the shine of your car but also provides an extra layer of protection against UV rays and contaminants. It can help preserve the paint’s integrity and prevent it from fading over time.
While waxing can be beneficial, it’s crucial to ensure that the wax doesn’t contain any abrasive components that can damage the existing ceramic coating. Therefore, it’s recommended to use a wax specifically designed for use on ceramic coatings.
By doing so, you can enjoy the benefits of both paint protection film and waxing, ensuring your car’s paint remains protected and looking its best.
Conclusion
In conclusion, by following proper waxing techniques, you can achieve long-lasting results for your surfaces. Understanding the purpose of waxing is crucial as it helps you protect and enhance the surface.
Whether it’s your car, furniture, or floors, preparing the surface beforehand ensures that the wax adheres properly and provides optimal results. Additionally, choosing the right wax for the specific surface is essential in achieving the desired outcome.
Once you have the right wax, applying it properly is key. By using the correct techniques and applying an even layer, you can ensure that the wax provides maximum protection and a beautiful finish. Remember to allow sufficient drying and curing time for the wax to set. Rushing this process can lead to subpar results and shorter-lasting effects.
Lastly, maintaining and protecting the surface is important for prolonging the lifespan of the wax. Regular cleaning and applying additional layers of wax when needed will help maintain the shine and protection for years to come.
By implementing these proper waxing techniques, you can enjoy the benefits of long-lasting results. Whether you’re looking to protect your car’s paint job, revitalize your furniture, or maintain the shine on your floors, a little effort in waxing goes a long way.
So, grab your wax and get to work, and soon enough, you’ll be admiring the beautiful, durable surfaces that proper waxing can achieve.